How to turn a TV into a menu board
Five steps, with examples from our shop.

A board people can read in three seconds sells better than a clever one. Here are six rules we use at our own shop.
A good menu board can be read in 3 to 5 seconds. That is our rule of thumb, from watching a real line at our shop. A customer looks up, finds one thing, and decides. Every tip below helps with that one rule.
We run Sweet Aloha Ice Cream in Davie, Florida, and all 5 of our TVs show boards we built. These are the six plain rules we follow. You can use them on any board: screen, paper or chalk.
Fewer items is easier to read. Our rule of thumb is about ten items in one block, and no more than three blocks on one board. If your menu is longer, split it into two boards that take turns on the screen, not one crowded one.
Try this today: count the items on your board. If you are above 25, find the five that sell least and move them to a second board, or cut them. Regulars know what they want. New customers get lost in a long list.
Put things that go together in one block, and give each block a short name: Scoops, Sundaes, Shakes. Inside a block, use one order that people can guess. A to Z works well for flavors. Price from low to high works well for sizes.
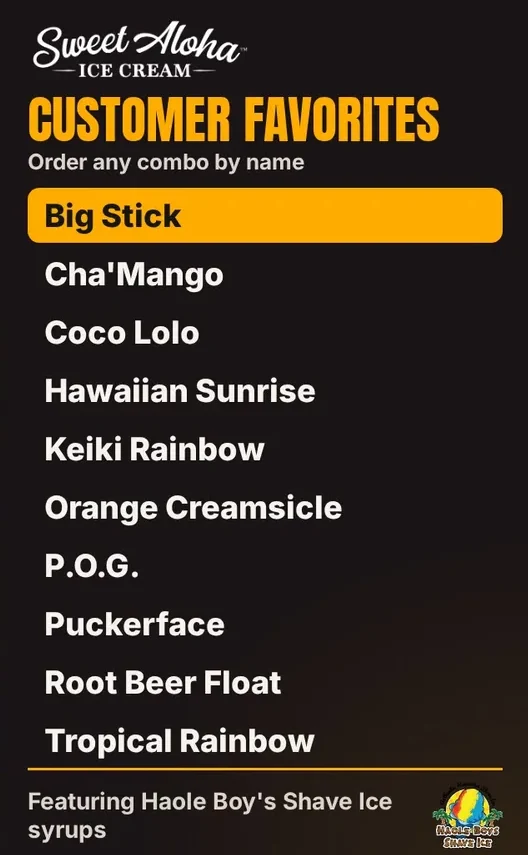
Our shave ice combo list is ten combos, A to Z, so a customer scans down and finds a name fast. The same shape every week means a regular does not have to hunt.
Put the price on the same side or in the same grid as the name, so the eye does not jump around the screen. Do not repeat a price in five places. If every scoop costs the same, show one grid instead of ten prices.
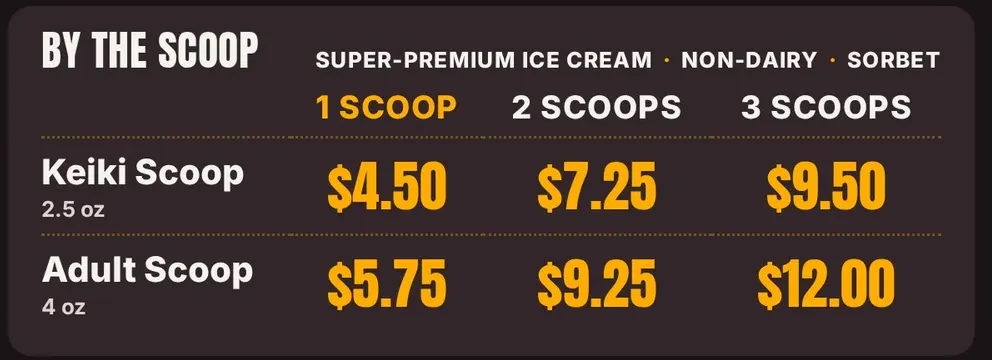
Our scoop board is one grid: two sizes across, one, two or three scoops down. That is six prices for every flavor we sell. Fewer, bigger numbers also mean fewer changes later. Skip dollar signs and cents when you can, so “5.25” stays small and tidy.
Use one plain font and keep it big. Our rule of thumb on a full-HD screen (1920 × 1080) is item names at about 40 pixels tall or more, and prices a bit larger. Use light letters on a dark panel, or dark on light. Do not put letters over a busy photo.
Skip thin or script fonts for prices. They look nice up close and turn to mush from across the room. If a name does not fit on one line, shorten the name rather than shrink the letters.
One real photo of a real item beats five small ones. Pick the item you most want to sell and show it large. Take the photo in good light, from the same angle each time, and keep the background plain.
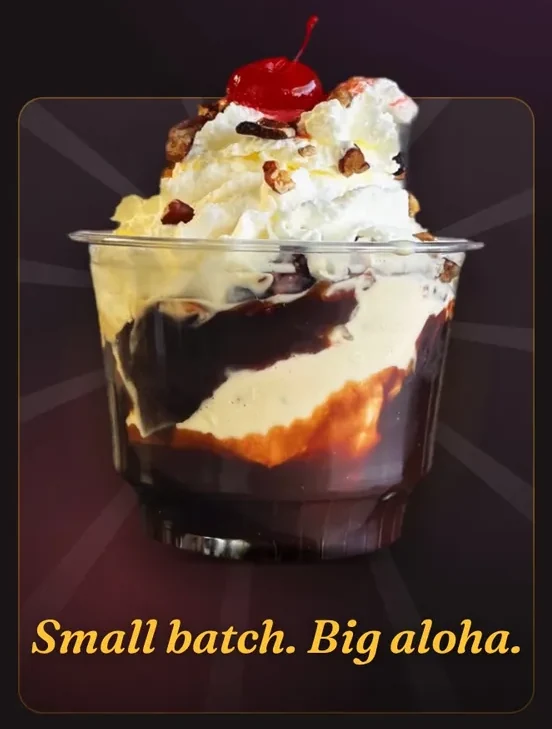
On our treats board the sundae photo sits beside the prices, so the picture sells and the numbers answer. Use your own food. A clean phone photo of your real product reads as honest, and customers notice when a picture does not match what they get.
Before you call a board done, stand where your farthest customer stands. Look for three seconds. Can you tell what the top item is and what it costs? If not, make the letters bigger or remove something.
Then look at the board on your phone at arm’s length. If it is still easy, it is probably good. Do this check each time you change the layout, and ask a friend who has never seen the menu to find one price. Time them.
Leave out long descriptions, tiny fine print, and anything a customer can learn at the counter. A board is a sign, not a menu book. If an item needs two lines to explain, tell people when they order. Keep the board for names, prices and one good photo.
Want help building a board like these? We set up your first screen with you. Try it free for 14 days, no card.
These rules work on paper and chalk too. A screen adds one thing: you can change a board without printing, so you can test a tip and fix it the same day. See the steps in how to turn a TV into a menu board, and the full list of features, with Live and Coming soon marked.
Five steps, with examples from our shop.
Seven ideas from a shop that runs them, with our real boards.
Keep prices right without the stress.
Move one thing, keep the prices still.
We open free trials a few shops at a time, and we set up your first screen with you.
14 days free, no cardNo contract. Cancel anytime.